Was ist ein Industrie-Panel-PC? Komponenten, Typen und Anwendungsbereiche
Ein Industrie-Panel-PC ist ein Computer mit integriertem Display, in der Regel einem Touchscreen, der für folgende Zwecke entwickelt wurde: ...
Das Eagle Touch-Entwicklungsteam
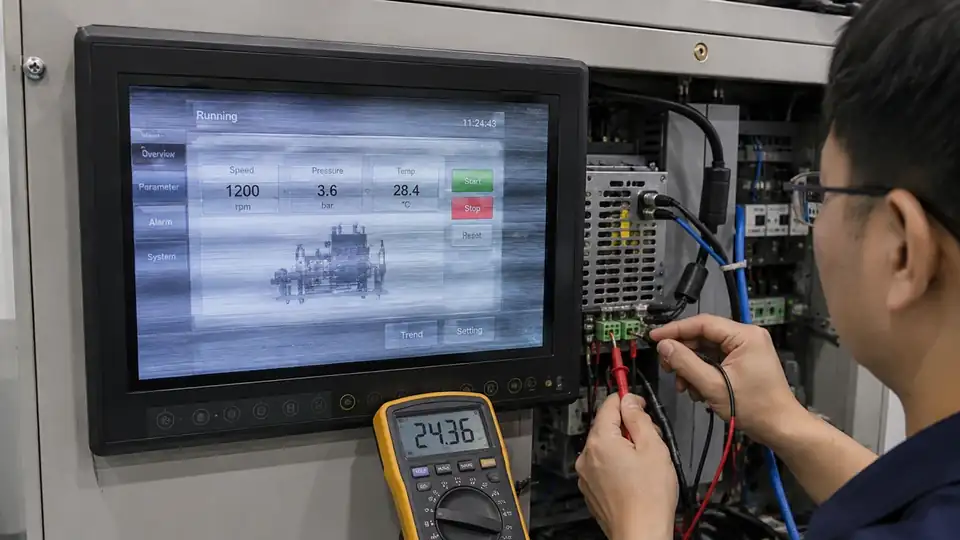
Das Flackern eines Industriemonitors bedeutet nicht immer, dass das LCD-Panel defekt ist. Die Ursache kann eine instabile Stromversorgung, ein falscher Videomodus, ein beschädigtes Kabel, elektrische Störungen, die Steuerung der Hintergrundbeleuchtung oder ein interner Monitorfehler sein.
Die entscheidende Frage lautet:
Tritt das Problem weiterhin bei demselben Monitor auf, nachdem die Stromversorgung, das Videokabel und die Signalquelle unabhängig voneinander getestet wurden?
Diese Unterscheidung hilft, unnötige Austauscharbeiten zu vermeiden, und zeigt, ob der Fehler im Monitor selbst oder an einer anderen Stelle im Gerät liegt.
Finden Sie zunächst heraus, was sich auf dem Bildschirm genau ändert.
| Symptom | Bereich, den man wahrscheinlich zuerst überprüfen sollte |
|---|---|
| Die Helligkeit steigt und sinkt, während das Bild sichtbar bleibt | Hintergrundbeleuchtungssteuerung, Dimm-Signal oder Stromversorgung |
| Der Bildschirm wird schwarz und kehrt dann wieder zum Normalzustand zurück | Eingangsleistung, Videoanschluss oder Quellenausgang |
| Bewegungsstreifen, Rauschen oder ein instabiles Bild | Videokabel, Signalablauf, Erdung oder elektromagnetische Störungen (EMI) |
| Das Flackern setzt ein, sobald ein Motor, ein Relais oder ein Wechselrichter in Betrieb geht | Gemeinsame Stromversorgung, Erdung oder elektrische Störungen |
| Der Fehler tritt nur bei einer bestimmten Auflösung auf | Nicht unterstützte Taktfrequenzen, Skalierung oder EDID-Kompatibilität |
| Nach dem Warmlaufen oder beim Kaltstart tritt ein Flackern auf | Fehler bei temperaturabhängiger Stromversorgung, Steuerung oder Hintergrundbeleuchtung |
Wenn der Bildschirm schwarz bleibt, anstatt sich wieder zu normalisieren, lesen Sie unseren Anleitung zur Fehlerbehebung bei einem schwarzen Bildschirm bei Industrie-Displays.
Bevor Sie irgendetwas ändern, halten Sie das ursprüngliche Symptom fest. Ein kurzes Video, das das Display, die Betriebsanzeige und den Betriebszustand des Geräts zeigt, kann als nützlicher Nachweis dienen.
Öffnen Sie das Bildschirmmenü des Monitors, während das Flackern auftritt. Sie können auch den Videoeingang trennen und den Bildschirm ohne Signal oder das integrierte Testbild beobachten.
Wenn das OSD stabil bleibt, hängt das Problem wahrscheinlich eher mit der Quelle, dem Kabel, dem Adapter oder dem Video-Timing zusammen.
Falls auch das OSD flackert, überprüfen Sie die Stromversorgung des Monitors und die interne Hardware.
Überprüfen Sie die erforderliche Spannung, Polarität und Stromstärke anhand der Produktspezifikation.
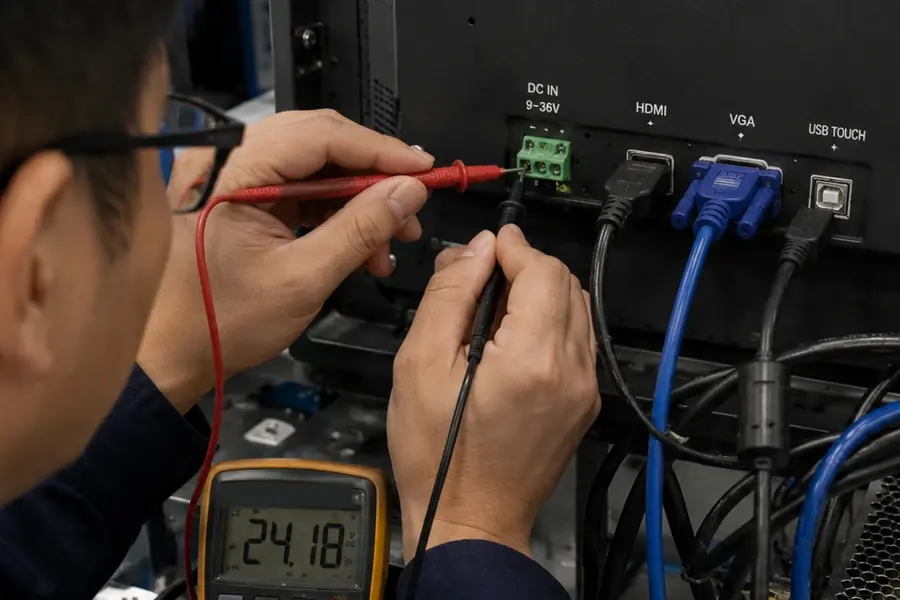
Messen Sie, sofern dies gefahrlos möglich ist, die Spannung am Eingang des Monitors, während das Gerät in Betrieb ist. Ein Netzteil kann ohne Last die korrekte Spannung anzeigen, diese jedoch abfallen, wenn der Monitor startet oder eine andere Maschinenkomponente eingeschaltet wird.
Vergleichen Sie das Ergebnis mit einem geregelten Netzteil mit der richtigen Nennspannung und Nennstromstärke.
Trennen Sie die Schutzerde nicht und nehmen Sie keine Änderungen an der Verkabelung der Maschine vor, ohne dass zuvor eine ordnungsgemäße elektrische Überprüfung durchgeführt wurde.
Stellen Sie die Signalquelle auf die native Auflösung des LCD-Bildschirms und eine vom Monitor unterstützte Bildwiederholfrequenz ein.
Manche Steuerplatinen können eine höhere Eingangsauflösung verarbeiten und diese auf das LCD skalieren. Die native Auflösung des Displays ändert sich dadurch nicht.
Falls das Flackern nach einem Update des Grafiktreibers, des Betriebssystems oder der Firmware aufgetreten ist, testen Sie die zuvor funktionierende Konfiguration, bevor Sie den Monitor austauschen.
Schließen Sie die Quelle mit einem kurzen, bekanntermaßen einwandfreien Kabel direkt an den Monitor an.
Vorübergehend entfernen:
Überprüfen Sie die Steckverbinder auf verbogene Stifte, unzureichenden Sitz oder Kabelzug. Bei vibrationsbehafteten Geräten sind verriegelbare Steckverbinder und Zugentlastungen besonders wichtig.
Schließen Sie den Monitor an eine andere Signalquelle an, von der Sie wissen, dass sie einwandfrei funktioniert.
Schließen Sie nach Möglichkeit auch einen weiteren funktionierenden Monitor an das Originalgerät an.
Das Ergebnis liefert in der Regel eine klare Richtung:
Beachten Sie, ob ein Flackern auftritt:
Eine reproduzierbare Betriebsbedingung ist oft aussagekräftiger als eine allgemeine Beschreibung des Fehlers.
Wenn das Display flackert, wenn ein Motor, ein Schütz, eine Heizung oder ein Wechselrichter in Betrieb ist, sollten Sie nicht davon ausgehen, dass elektromagnetische Störungen (EMI) die einzige Ursache sind.
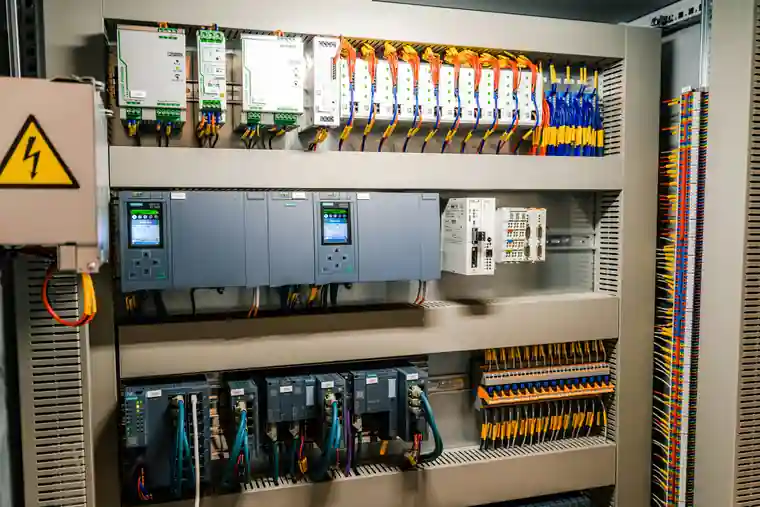
Das Ereignis kann Folgendes zur Folge haben:
Betrachten Sie die Stromverteilung, Erdung, Abschirmung und Kabelverlegung als ein Gesamtsystem. Halten Sie Niederspannungs-Signalkabel, soweit es die Maschinenkonstruktion zulässt, von Hochstrom-Schaltkabeln fern.
Ein Steckverbinder kann zwar sicher erscheinen, verliert jedoch bei Vibrationen für den Bruchteil einer Sekunde den Kontakt.
Überprüfen Sie zunächst die externen Strom- und Videoanschlüsse. Untersuchen Sie die internen Kabelbäume nur, wenn das Gerät ausgeschaltet ist und der Hersteller den Zugriff darauf gestattet hat.
Öffnen Sie einen versiegelten oder noch unter die Garantie fallenden Monitor nicht ohne Genehmigung.
Eine Störung, die nach dem Aufwärmen auftritt, kann an einer Leistungskomponente, einer Steuerplatine, einem Steckverbinder oder einem Treiber für die Hintergrundbeleuchtung liegen.
Das Flackern beim Kaltstart kann eine andere Ursache haben.
Notieren Sie die Temperatur in der Nähe des Monitors und vergleichen Sie sie mit dem angegebenen Betriebsbereich. Die Temperatur im Gehäuse kann deutlich höher sein als die Umgebungstemperatur.
Wenn das Bild weiterhin sichtbar ist, die Helligkeit bei niedrigen Einstellungen jedoch pulsiert, überprüfen Sie Folgendes:
Ein Flackern bei geringer Helligkeit allein ist noch kein Beweis dafür, dass PWM die Ursache ist. Wenn das gesamte Bild verschwindet, führen Sie die Stromversorgungs- und Videotests erneut durch.
Die oben genannten Tests gelten hauptsächlich für komplette Industriemonitore mit HDMI-, DisplayPort-, DVI- oder VGA-Eingängen.
Bei einem unbestückten LCD-Modul mit LVDS- oder eDP-Anschluss ist außerdem Folgendes zu überprüfen:
Keine Schnittstelle ist automatisch in jeder Anwendung zuverlässiger. Die Leistung hängt von der Kabellänge, der Abschirmung, der Erdung, dem Halt der Steckverbinder, dem Signaltiming und dem Leiterplattenlayout ab.
| Testergebnis | Empfohlene Maßnahme |
|---|---|
| Das Flackern verschwindet, nachdem das Netzteil, das Kabel, der Videomodus oder die Quelle gewechselt wurden. | Die Integration der Geräte korrigieren |
| Mehrere Monitore zeigen denselben Fehler während desselben Maschinenereignisses an | Gemeinsam genutzte Stromversorgungen, Erdungen und elektrische Störungen prüfen |
| Der Fehler tritt unter Testbedingungen, bei denen die Funktionsfähigkeit eines Monitors bestätigt wurde, bei einem Monitor auf | Überprüfen Sie die Stromversorgungsplatine, den Controller, die Hintergrundbeleuchtung, die Kabelbäume und die LCD-Baugruppe des Monitors |
| Das Problem beschränkt sich auf eine austauschbare Platine oder ein Kabel. | Eine Reparatur könnte sinnvoll sein |
| Das LCD oder die Hintergrundbeleuchtung wird nicht mehr hergestellt oder eine Reparatur wäre unwirtschaftlich | Einen Ersatzmonitor prüfen |
| Der ursprüngliche Monitor ist für die Betriebsumgebung ungeeignet. | Ersetzen Sie es durch ein Modell, das für die tatsächlichen Bedingungen ausgelegt ist. |
Für einen nicht mehr lieferbaren Monitor ist nicht immer ein neues Gehäuse erforderlich. Oft lässt sich ein Ersatzmodell auf der Grundlage des bestehenden mechanischen und elektrischen Designs entwickeln.
Bitte überprüfen Sie die folgenden Angaben, bevor Sie ein Ersatzteil auswählen:
| Informationen | Warum das wichtig ist |
|---|---|
| Bildschirmgröße, Seitenverhältnis und native Auflösung | Gewährleistet die Beibehaltung des Bildlayouts und der Softwarekompatibilität |
| Gesamtabmessungen und Ausschnittmaße | Legt fest, ob die vorhandene Einfassung beibehalten werden kann |
| Befestigungsstruktur | Bestätigt die Installation als Open-Frame-, Panel-Mount- oder VESA-Montage |
| Videoeingang und unterstützte Taktfrequenzen | Stellt die Kompatibilität mit dem vorhandenen Controller sicher |
| Eingangsspannung und Stromanschluss | Verhindert unnötige Änderungen an der elektrischen Anlage |
| Touch-Technologie und Benutzeroberfläche | Stellt die Eingaben des Bedieners und die Softwarekommunikation sicher |
| Helligkeit und Dimmverfahren | Geeignet für den Einsatz in Innenräumen, im Freien oder bei automatischer Dimmung |
| Betriebstemperatur und Frontschutz | Stellt die Eignung für die Installationsumgebung sicher |
| Anforderung an die Schlagfestigkeit | Bestätigt die erforderliche Ausführung des Deckglases und der Baugruppe |
| Menge und voraussichtliche Lebensdauer des Produkts | Sorgt für eine stabile Komponentenauswahl und eine gesicherte zukünftige Versorgung |
Eagle Touch entwickelt Industriemonitore, Monitore mit offenem Gehäuse und Touch-Monitore für den Einbau in Schalttafeln für OEM-Geräte.
Mechanische Abmessungen, Deckglas, Helligkeit, Touch-Oberfläche, Videoeingang und Stromanschluss können an das Gerät angepasst werden, anstatt allein anhand der Bildschirmgröße ausgewählt zu werden.
Um einem Lieferanten bei der Beurteilung des Problems zu helfen, bereiten Sie Folgendes vor:
Nicht unbedingt. Der Kameraverschluss kann mit der Bildwiederholfrequenz des Displays oder der Dimmfrequenz der Hintergrundbeleuchtung in Wechselwirkung treten und Streifen erzeugen, die für das menschliche Auge nicht sichtbar sind.
Stellen Sie sicher, ob das Flackern für das Bedienpersonal direkt sichtbar ist. Bei Anwendungen mit Kameras oder Bildverarbeitungssystemen sind unter Umständen separate Flackertests erforderlich.
Möglicherweise stellen die Quelle und der Monitor gerade die Videoverbindung wieder her, lesen EDID-Daten aus oder passen die Ausgabetiming-Parameter an.
Überprüfen Sie die native Auflösung, eine unterstützte Bildwiederholfrequenz und eine direkte Kabelverbindung. Tritt das Problem nur bei einem bestimmten Computer oder Controller auf, überprüfen Sie dessen Grafiktreiber, Firmware und Energieverwaltungseinstellungen.
Die Betriebs-LED zeigt lediglich an, dass der Monitor weiterhin mit Strom versorgt wird.
Möglicherweise liegt weiterhin eine Störung der Videoverbindung, der Steuerplatine oder der Hintergrundbeleuchtung vor. Prüfen Sie, ob das OSD-Menü oder der „Kein Signal“-Bildschirm angezeigt wird, und überprüfen Sie anschließend die Signalquelle, das Kabel und die Eingangsspannung des Monitors.
Manche Monitor-Controller-Platinen können eine höhere Eingangsauflösung verarbeiten und diese auf das LCD-Display skalieren.
Die native Auflösung des Bildschirms ändert sich nicht. Verwenden Sie nach Möglichkeit die native Auflösung und vergewissern Sie sich, dass alternative Eingabetaktfrequenzen offiziell unterstützt werden.
Teilen Sie uns bitte das aktuelle Monitormodell, das Fehlervideo, den Anwendungszweck, die Installationsart und die benötigte Stückzahl mit.
Wir können Ihnen dabei helfen, zu entscheiden, ob als nächster Schritt weitere Tests, eine Reparatur oder ein Originalersatzteil erforderlich sind.
Ein Industrie-Panel-PC ist ein Computer mit integriertem Display, in der Regel einem Touchscreen, der für folgende Zwecke entwickelt wurde: ...
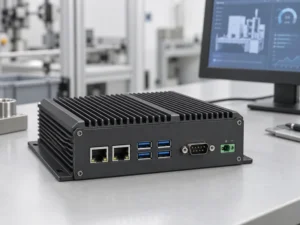
Ein Embedded-PC ist ein Computer, der so konfiguriert ist, dass er als Teil einer Maschine oder eines größeren Systems funktioniert. ...
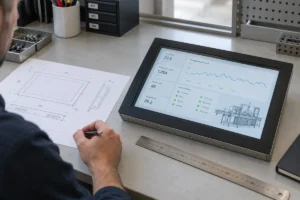
Beginnen Sie mit der Software, die auf dem Panel-PC laufen soll, und den Anforderungen, die er erfüllen muss. Dann ...

Bei der Auswahl der Schutzart für einen industriellen Panel-PC sollten zunächst zwei Fragen geklärt werden: Welcher Staub- und Wasserbelastung ist das Gerät ausgesetzt? ...
Teilen Sie uns Ihre Anwendung, Ihre Anforderungen oder Ihre aktuelle Herausforderung mit. Unser Team wird die Details prüfen und Ihnen einen praktischen Lösungsansatz vorschlagen.