What Is an Industrial Panel PC? Components, Types and Applications
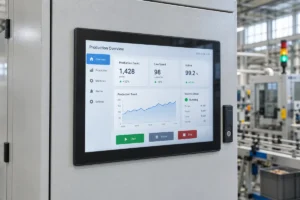
An industrial panel PC is a computer with a built-in display, usually a touchscreen, designed for …
Eagle Touch Engineering Team
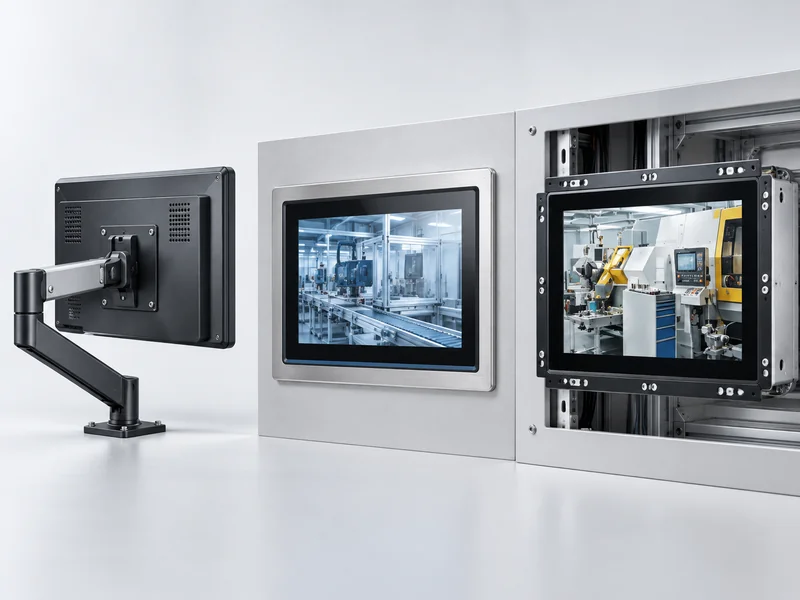
Choose panel mount when the computer will sit in a cabinet or machine-panel cutout. Choose VESA mount when it needs to attach to an arm, stand or wall bracket. Consider open frame when your equipment design must define the front appearance and internal fixing arrangement.
The next question is whether the complete installation will fit. A panel PC includes the computer behind the screen, so the drawing review must account for its housing, heat dissipation, connectors and removal path—not just the display opening.
| Check | Panel mount | VESA mount | Open frame |
|---|---|---|---|
| Typical location | Cabinet door or machine panel | Arm, stand or wall bracket | Inside custom equipment |
| Fixing interface | Front bezel with specified rear clamps or fixings | Rear mounting holes and a compatible bracket | Flanges, mounting ears or agreed fixing points |
| Front arrangement | Product bezel overlaps the opening | Enclosed unit remains exposed | Integrated with the equipment front |
| Main selection constraint | Cutout, panel thickness and clamp access | Bracket compatibility, load and cable movement | Structural support and responsibility for protection |
These options are not always mutually exclusive. Some standard industrial panel PCs support both panel and VESA mounting. Select the arrangement that works in the finished machine; available holes alone do not settle the choice.
A typical panel-mount PC enters the opening from the front. Its bezel overlaps the equipment panel, while clamps or other specified fixings secure it from behind. Where front sealing is provided, a gasket seals the interface between the bezel and mounting surface.
This suits a fixed operator interface on a control cabinet or machine. It uses the existing panel without adding a separate support arm.
Check the manufacturer’s cutout drawing before cutting metal. Two computers with the same screen diagonal can have different body dimensions, corner radii and fixing positions. Confirm the permitted panel thickness, bezel overlap and space needed to insert and tighten every fixing.
A front IP rating applies under the manufacturer’s installation conditions. Panel flatness, gasket condition and correct fixing all matter. It does not establish equivalent protection for rear connectors or the entire cabinet. Tighten to the specified procedure rather than increasing torque to compensate for a poor fit.
Panel mount also does not necessarily mean the glass is perfectly level with the surrounding machine surface. If that appearance matters, agree the front section drawing.
If there is no rear access, resolve installation and removal before choosing a conventional rear-clamped model.
VESA mounting connects the rear of the panel PC to a compatible support. Common patterns include 75 × 75 mm and 100 × 100 mm, but the actual model drawing must govern selection. Wall mounting describes the installation location; it may still use a VESA interface.
An arm can suit an inspection station where operators adjust the screen position. A fixed bracket may be enough where the viewing position stays unchanged.
Matching the hole pattern is only the first check. Confirm the support’s load range and compatibility with the computer’s size and centre of gravity. A deep panel PC places its mass differently from a thin monitor. Check the arm manufacturer’s limits at the intended extension and angle.
Use the specified screw thread and permitted insertion depth. A screw that is too long can bottom out or damage internal parts; one that is too short may provide insufficient engagement.
During touch operation, the screen should remain steady. Check joint locking and base attachment, then move the arm through its full travel with cables connected. Provide strain relief and enough slack without leaving cables where they can catch.
VESA mounting does not determine ingress protection. An exposed station needs an enclosure and connectors suited to its environment. Yoke mounts are another option where a model supports side attachment and controlled tilt.
An open-frame panel PC is intended to become part of the equipment structure. It may use mounting flanges, ears or a custom bracket arrangement. The amount of rear enclosure varies; “open frame” does not necessarily mean exposed electronics everywhere.
This approach is useful when a standard bezel interferes with the machine’s appearance or mounting layout. It gives the equipment designer more control over the front interface and fixing positions.
That flexibility requires a clear agreement between supplier and machine builder. Establish who provides the front sealing, rear protection, structural support and service access. If the equipment front includes additional glass, review the touch and display assembly with the supplier before freezing that design.
Support the unit at its intended fixing points. Do not use the glass or display assembly to pull a misaligned frame into position. The installation should avoid twisting the chassis or concentrating pressure around the screen.
A custom machine does not automatically need open frame. If an existing panel-mount unit fits the opening and appearance requirements, it may reduce mechanical design work.
Request the drawing for the exact configuration being quoted. A different motherboard, heatsink or connector arrangement may change the usable installation space.
| Check | What to confirm |
|---|---|
| Complete installed depth | Include housing, mating connectors and cable bends; check the cabinet door can close. |
| Connector access | Leave room to insert plugs, operate latches and secure any connector screws. |
| Cooling and orientation | Follow the permitted mounting orientation and clearance requirements; account for nearby heat sources. |
| Supporting structure | Check the panel, hinges, bracket or frame for the installed load and operating conditions. |
| Service access | Confirm tools can reach the fixings and the complete computer can be withdrawn. |
A fanless panel PC still needs to release heat. Assess it inside the proposed enclosure with its actual computing workload. A successful bench test in room air does not confirm operation in a closed cabinet.
Keep mechanical dimensions and mounting instructions tied to a drawing revision. This also gives purchasing a clear reference when ordering replacement units.
Before approving production, install a sample in the actual equipment or a representative fixture.
Record changes to the bracket, gasket, cable routing or enclosure before approving the production drawing.
Eagle Touch supports custom industrial panel PC configurations with mounting and enclosure review for OEM equipment.
Send your panel cutout or equipment drawing, available rear depth, preferred screen size, installation position, required connections and operating environment. Include the sample quantity and expected production volume.
With those details, we can review whether an existing structure fits or which mechanical changes need to be agreed before a sample is built.
An industrial panel PC is a computer with a built-in display, usually a touchscreen, designed for …
An embedded PC is a computer configured to work as part of a machine or larger …
Start with the software the panel PC must run and the conditions it must fit. Then …
Choosing an industrial panel PC IP rating starts with two questions: what dust and water exposure …
Share your application, requirements, or current challenge. Our team will review the details and recommend a practical way forward.